This summer I bought a lovely flower printed fabric on sale, which sadly didn’t get turned into a summer dress. As I pulled it out of my closet last week, I decided to try and make a handkerchief/hanky skirt, just to see how it turned out. I figured I could always wear it with some thicker pantyhose this fall, and have the bonus of starting next summer with a new summer skirt already in my closet. I decided to try and do my very first how-to post on how I made this skirt, in case someone would want to make this very easy skirt themselves.
First a little bit about the geometry of the skirt: A hanky skirt is made like a square circle skirt, basically it’s just a square with a hole in the middle. How big the square and the hole are (and the difference between the two) decide how long the skirt will be. The skirt length varies between the corners and the sides of the square, with the corners being the longest points on the skirt. The circle in the middle is equal to the circumference of your body, whether you want a skirt at your waistline or hip line, or somewhere in between. The width of the fabric is the limit for how big your square will be, if you don’t decide to sew more lengths of fabric together to make a larger square.
Layout for basic handkerchief skirt
To get the radius (half of the diameter) of the circle you have to divide your circumference by 2π (r = c/(2π)). To add seam allowance to your skirt you have to make a smaller circle than your circumference. I prefer 1,5 cm (0,6″) seam allowance, and add this simply by subtracting this number from my radius before cutting the fabric. If you (like me) want to add a zipper, you should add the seam allowance for this to the circumference before calculating your radius. (I used 1,5 cm (0,6″) on both sides of the zipper, thus adding 3 cm (1,2″) to my circumference before dividing through 2π).
I wanted to add a quarter circle waistband to my skirt. The radii of this band (inner radius=upper part, outer radius = lower part of the waistband) are decided by multiplying the circumferences by four and dividing this number through 2π (r=(4c)/(2π)). To add seam allowance to the inner quarter circle, simply subtract the seam allowance from the inner radius. To add seam allowance to the outer quarter circle, add it to the outer radius. In addition, you need to add seam allowance at the ends of each waistband so they can be sewn together, either with each other or with a zipper.

Layout for quarter circle waistband
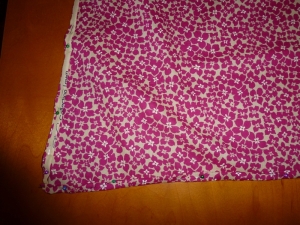
My fabric was just 95 cm (37″) wide, so the skirt would not be a long one. Instead of making it longer, I wanted to make two layers, with a total of 8 corners to get a more evenly distributed skirt length that wasn’t too short for me to wear.
If you, like me, use the whole width of the fabric, I think the easiest way to make this skirt, was to make a pattern piece for the circle in the skirt (I made a quarter circle), and a pattern piece for the waist band.
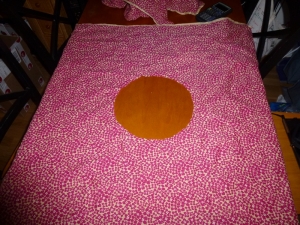
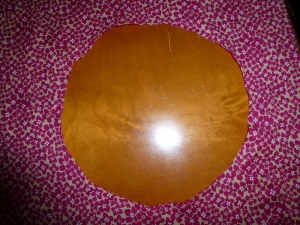
Fold the fabric in half and half again and cut out the circle.
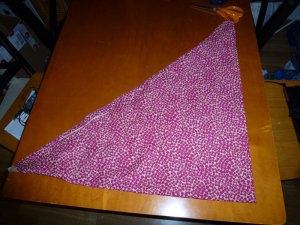
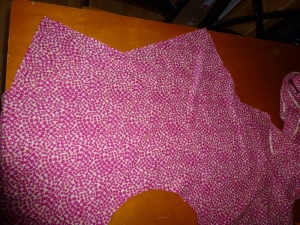
First, fold your fabric in two diagonally and cut away your square. Then fold it again in two diagonally. Pin the quarter circle in place in the corner and cut around it. Now you have the basic skirt. Make as many squares as you want, if you want a layered skirt.
Skirt fabric folded in quarter, half and without fold.
If you decide to make the waistband, you need to cut two of it from the fabric (make sure the straight grain is parallel to one of the sides of the waistband). As I worked with a lightweight cotton fabric, I interfaced the outer waistband piece (vlieseline H-200).
Quarter circle waistband.
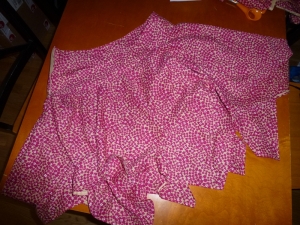
Hem the skirt pieces by folding the edges two times (like a rolled hem) before sewing the skirt pieces together along the circle.
Above: Skirt hem.
Below: Two layers sewn together.
Then fasten the outer waistband piece right sides facing and press the seam allowance into the waistband. If you want to install a zipper, cut through the skirt by the waistband opening to make room for the zipper (I think an invisible zipper works best for this skirt), and secure the cut fabric pieces (overlock or zig-zag stitch). Fasten the zipper to the skirt and waistband as explained here. Be sure not to sew the zipper into the upper seam allowance of the waistband.
Above: Attaching the outer waistband to the skirt.
Below: Making room to install the zipper.
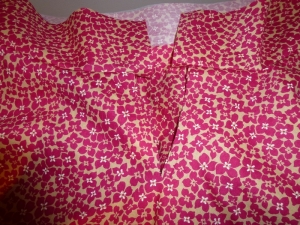
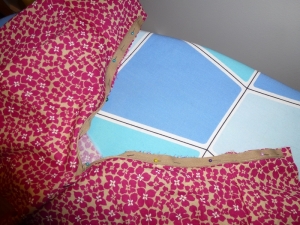
Fasten the inner waistband piece right sides facing along the upper edge of the waistband and fold it inside the skirt. Fold the bottom seam allowance and the seam allowance at the zipper into the waistband and stitch it in place. I also did a top stitch on my waistband. Et voilà! You now have made a hanky skirt.
Please let me know if you have questions, and if you make this skirt, I would love to see it!
From the rest of my fabric and some synthetic chiffon , I made a wrap-around blouse. This also was a fairly easy project to do (although I still managed to make some mistakes with the sleeves …).
I think the blouse and the skirt together look more like a dress.
Above: With and without folded up sleeves.
Below: Side and rear views.








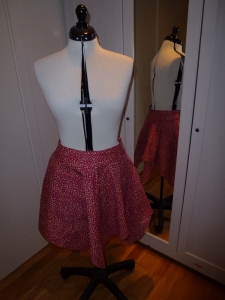

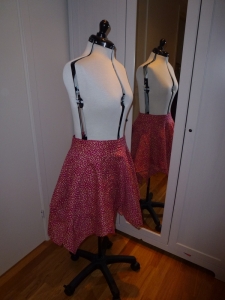


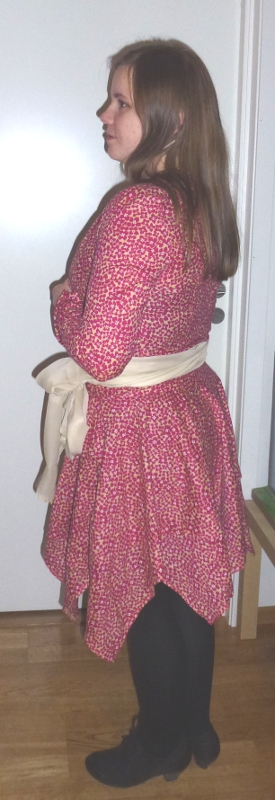

It looks great! LOVE the print! I might just help my daughter sew a skirt like that for her first project that isn’t a pillow case.
Thank you! It should be a great beginner’s (non-pillow case) project, I hope you’ll both enjoy the process 🙂
If you were to put an elastic waistband in instead would I need to cut the material and put a seam in to make a casing?
Hi Kristen, and thank you for commenting. If you want an elastic waistband, make sure your skirt is big enough to fit over your hips (instead of fitting the inner radius to your waist circumference, you make it big enough for your hip circumference). I hope this answered your question, but I’m not sure I understand your question about cutting the material and make a casing – care to elaborate?
I found this site as I was wanting to get a general cutting idea of how much material was in a handkerchief skirt. I found this picture of a dress I thought I would make. Do you think that the same waist measurement would work if I stitched the skirt part onto a tube top? Thanks! Your skirt is really cute!

Thank you Tonya!
If you use a stretchy material (and seam) for your skirt and top, I imagine it could work with the waist measurement. With a woven material you’d need a zipper. I’ve also seen circle skirts where the hip measurement is used instead of waist measurement. The waistband on these skirts are usually made out of rib knitted fabric (stretchy). Please feel free to ask again, and show me the dress when you’re finished – I’d love to see it! Good luck on your project!
Great tutorial will be great for the ‘disney theme’ dress I have in mind. Its for a retro dance so its a drop waist 20’s style dress but in green. I wanted to give the impression of the petal like points on tinkerbells dress.
Thank you! And your tinkerbell’s dress sounds like a lovely project – feel free to share pictures and good luck!
I love your outfit! It’s cute and unique and the print is adorable! I was trying to make my own square skirt to use as the bottom of a dress a couple months ago and ended up doing a lot of the same math you did…it was a lot of geometry. I’ve since written a computer program that makes your own square skirt pattern for you given your waist and length measurements. Check it out here! http://anelisemadeit.blogspot.com/2014/08/skirts-in-seconds-square-skirt-pattern.html
Thank you for your kind comment!
And the program you made is sure to be a lifesaver for sewists who don’t like to waste time with numbers before they make a skirt – well done!
Also, your sunset dress is beautiful.
While I am not a geometry expert, your formula (as well as the rest of the web’s) did not work for me. First, I needed a 46″ circumference (d=23; 4=11.5) but using the pi thing netted me a 7.35″ quarter circle and the resulting cut from my fabric left a 19″ diameter circle. I too am doing the elastic waist and using 2 layers for my daughter’s skirt. Being that the fabric she wanted is only 42′ w I made a square 42×42 and folded as you said with the pattern piece and cut the 1/4 circle with no problem but my hole is not big enough. HELP? Seems to me if d=23″ then my quarter circle should have been 11.5 on each side.
Hi Sheila, and thanks for commenting.
I’m not sure I understand your question, but I’ll try answering you anyway. Feel free to ask follow-ups if needed 🙂
A circumference of 46″ translates to a radius of 7,32″.
Your diameter of 23″ (and radius of 11,5″) would make a circle with a 72,2″ circumference (c=π*d or c=π*2*r), which is larger than your original circumference of 42″.
Your problem is luckily an easy one to fix, as it’s much easier to make circumference larger than making it smaller in this instance. I would measure my circumference again just to make sure my number is correct and recalculate based on this number. If the circle is still too small, just calculate how much larger you need it to be and cut out a larger quarter circle.
Hope this helps and let me know if you have more questions! Good luck on your daughter’s skirt, I’m sure it’ll be lovely!